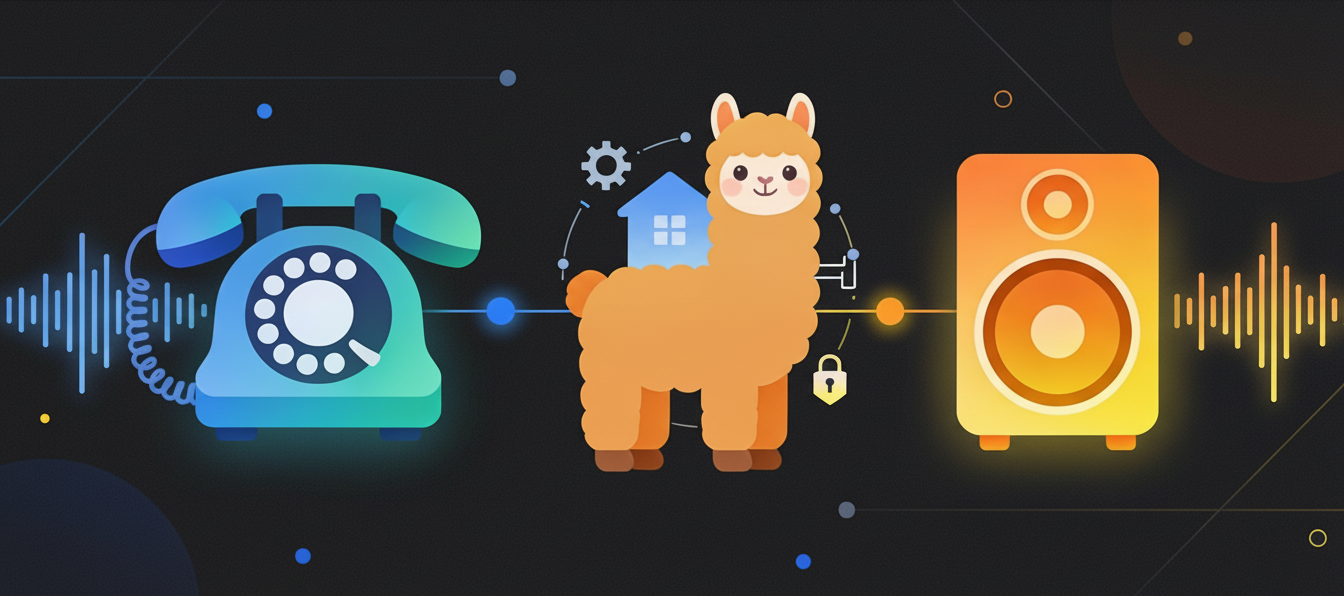
Building a Fully Local and Private Voice Assistant with Home Assistant
The Unexpected Idea: From Intercom to Voice Control
It started simple. I wanted a cheap intercom system for my home, so I picked up a Grandstream HT802 analog telephone adapter. It has two FXS ports, SIP support, and is designed to work with VoIP systems. Perfect for basic phone-to-phone calling between floors. I know it’s a bit overkill but that’s the way I like it.
But then I realized something, this device can register to Home Assistant’s VoIP integration, which means it can connect to a voice assistant. And if I combine that with free, local AI models, I can build something far more powerful than a simple intercom.
What I ended up with is a fully local, fully private voice assistant that:
- Understands natural language commands to control smart home devices
- Answers general knowledge questions using an LLM
- Runs entirely on my own hardware (no cloud, no API keys to manage)
- Uses customizable voices for TTS output
- Responds fast enough for a real conversation
In this post, I will walk you through exactly how to build this setup.
The Architecture: Whisper + Piper + Ollama
The voice assistant pipeline consists of three key components using Home Assistant as the orchestrator that ties everything together via the VoIP and Assist integrations :
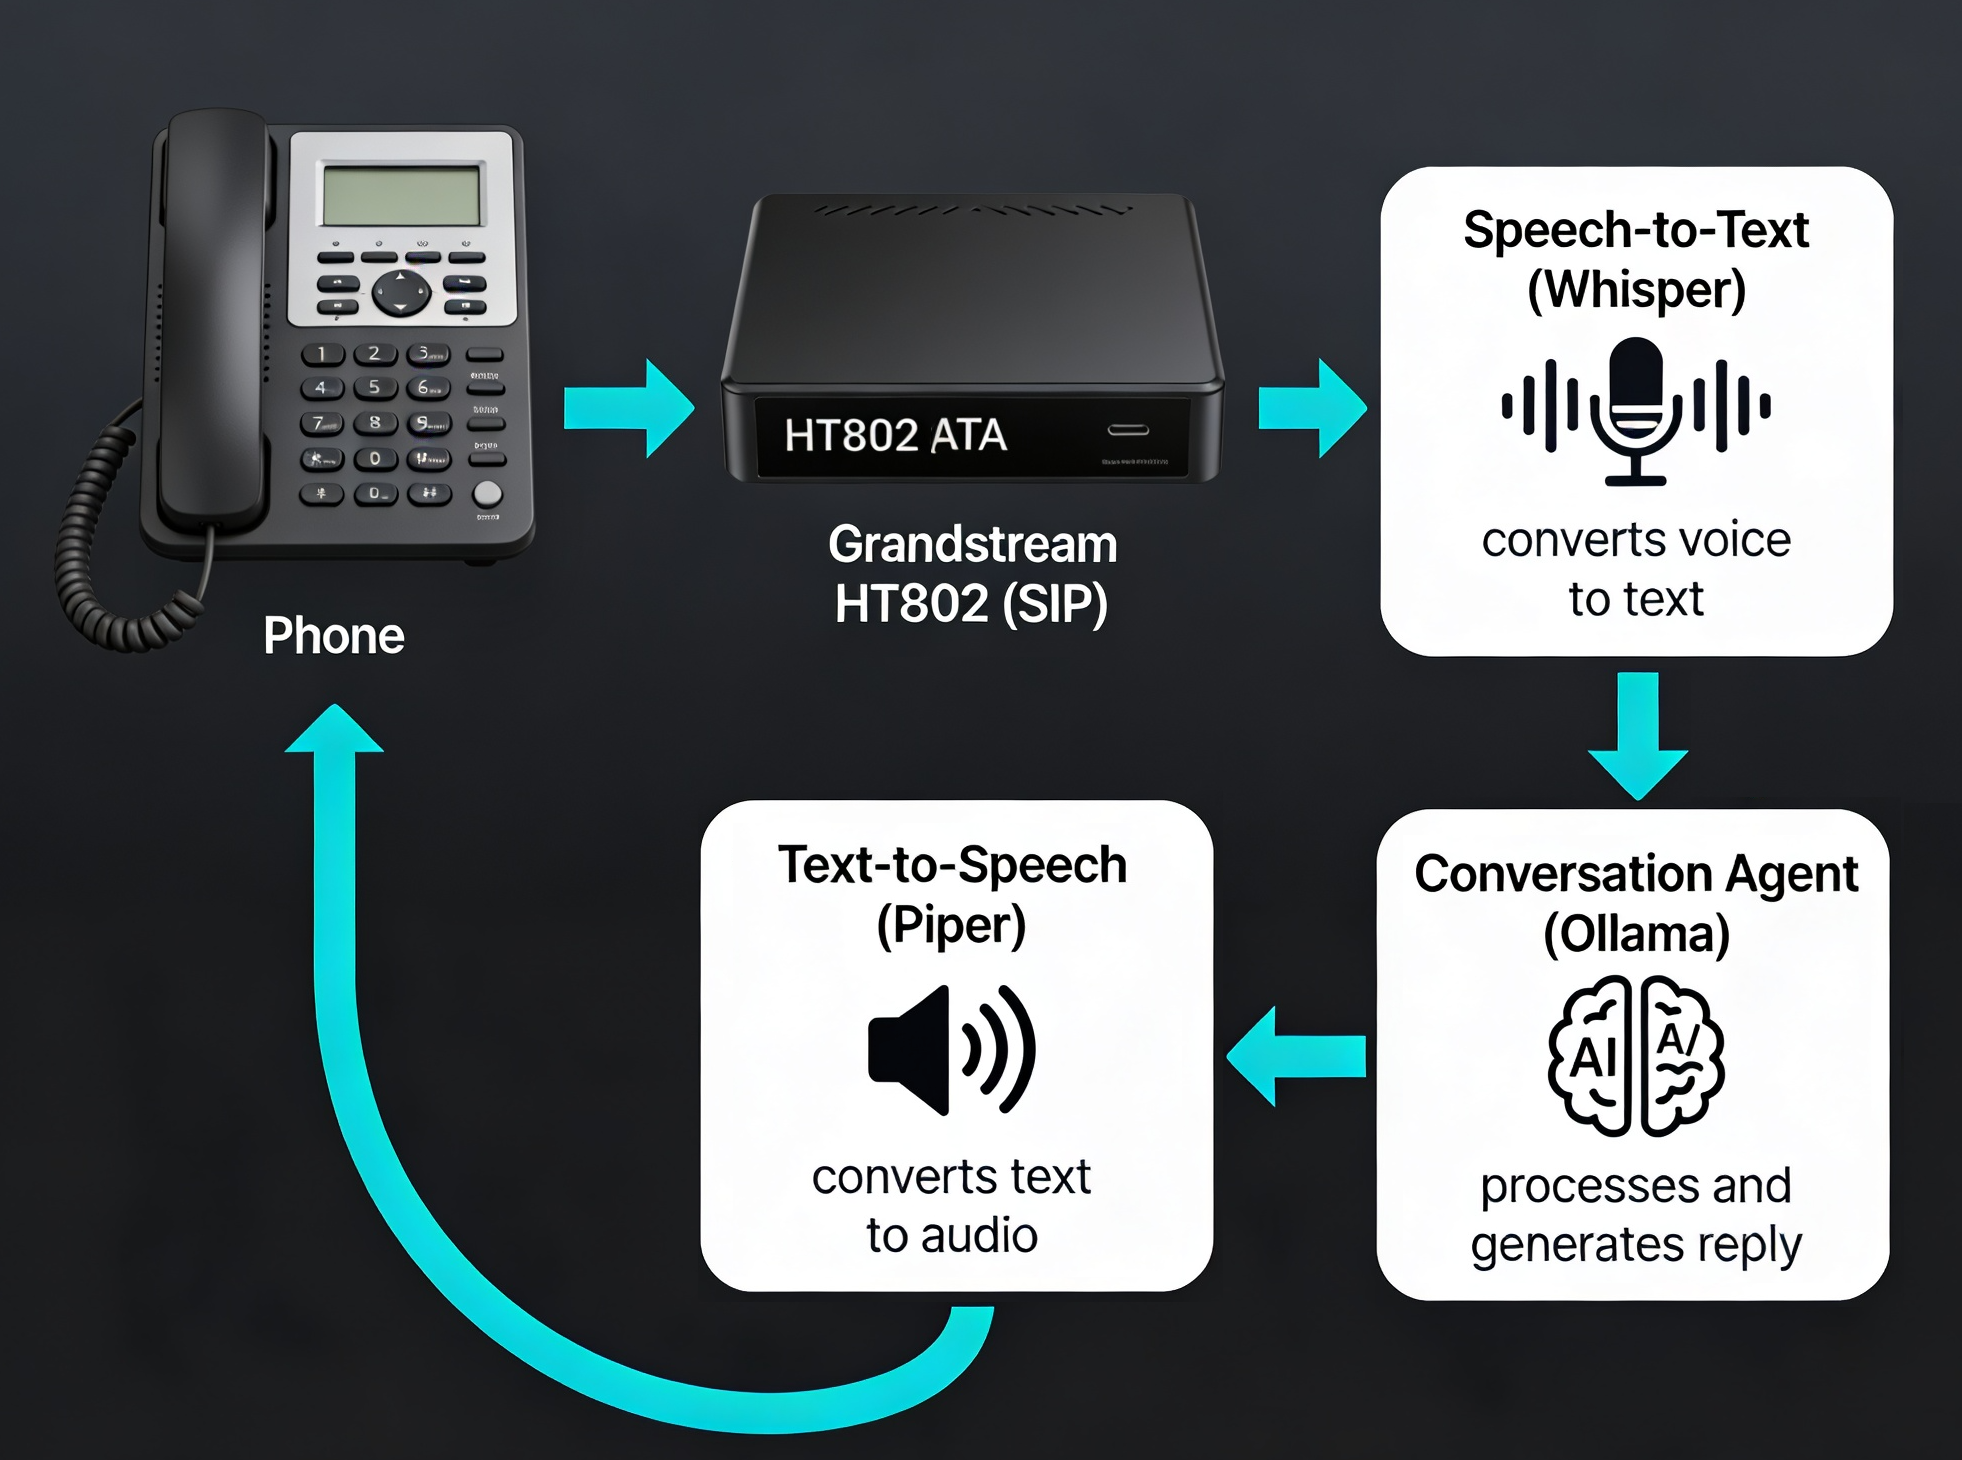
Each component is independent and can be optimized separately:
- Whisper (OpenAI): Fast, accurate speech recognition that runs locally
- Piper (Rhasspy): Fast neural TTS with multiple voices and languages
- Ollama: Local LLM inference engine (supports Llama, Mistral, Phi, and dozens of open models)
Hardware Requirements
You do not need much:
- Grandstream HT802 (~$50-80): Analog telephone adapter with two FXS ports and SIP support
- Zimaboard or similar edge device (or any x86/ARM box): Runs Home Assistant + Whisper + Piper in Docker
- Mac, Linux, or another machine: Runs Ollama (the heavier LLM inference)
- An analog phone or two: For making calls to the assistant
The beauty is that Whisper and Piper are lightweight enough to run on the Zimaboard alongside Home Assistant. Only Ollama (the LLM) needs a bit more horsepower, so I run it separately on my Mac.
Step 1: Set Up the Grandstream HT802
Register to Home Assistant SIP
- Log into the HT802 web UI
- Go to FXS Port 1
- Configure SIP:
- SIP Server: Your Home Assistant IP (e.g.,
192.168.x.x) - SIP User ID:
phone1(or any identifier) - Authenticate ID: same as SIP User ID
- Authenticate Password: any password
- SIP Server: Your Home Assistant IP (e.g.,
Test the Basic Connection
- In Home Assistant, go to Settings → Devices & services → Voice over IP
- You should see your HT802 device appear
- Confirm Allow calls is enabled
- Pick up the phone, you should hear a tone
Step 2: Set Up Whisper (Speech-to-Text) and Piper (Text-to-Speech) in Docker
Create a new docker-compose.yml alongside your Home Assistant compose:
1
2
3
4
5
6
7
8
9
10
11
12
13
14
15
16
17
18
19
20
services:
  wyoming-whisper:
    image: rhasspy/wyoming-whisper:latest
    container_name: wyoming-whisper
    restart: unless-stopped
    ports:
      - "10300:10300"
    volumes:
      - /path/to/storage/wyoming-whisper:/data
    command: ["--model", "base", "--language", "en", "--data-dir", "/data"]

  wyoming-piper:
    image: rhasspy/wyoming-piper:latest
    container_name: wyoming-piper
    restart: unless-stopped
    ports:
      - "10200:10200"
    volumes:
      - /path/to/storage/wyoming-piper:/data
    command: ["--voice", "en_US-lessac-medium", "--data-dir", "/data"]
Key points:
- Whisper model: Start with
basefor a good speed/accuracy balance on a Zimaboard. Usetinyif it’s slow,smallormediumif you have higher CPU/RAM. - Piper voice:
en_US-lessac-mediumis a good default. Other options:en_US-amy-low,en_US-arctic-medium,en_US-danny-medium. See the Piper voice list for all options. - Volumes: Store models persistently locally so they do not re-download each time on container restart
- Ports:
10300for Whisper,10200for Piper
Step 3: Configure Home Assistant to Use Whisper and Piper
Add the Wyoming Integrations
- Go to Settings → Devices & services → Add integration
- Search for and add Wyoming
- Configure two instances:
- Whisper (Wyoming): Host =
127.0.0.1, Port =10300 - Piper (Wyoming): Host =
127.0.0.1, Port =10200
- Whisper (Wyoming): Host =
Create Your Voice Assistant Pipeline
- Go to Settings → Voice assistants → Create assistant
- Name it (e.g., “Home Phone Assistant”)
- Configure the pipeline:
- Speech-to-text: Wyoming Whisper
- Conversation agent: (we will set this in the next step)
- Text-to-speech: Wyoming Piper
At this point, do not set the conversation agent yet. We need to connect Ollama first.
Step 4: Connect Ollama
On Your Mac (or other machine running Ollama):
- Install Ollama from ollama.ai
- Pull a model:
1 2
ollama pull mistral # or: ollama pull llama2, neural-chat, phi, dolphin-mixtral, etc. - Start Ollama (it listens on
http://localhost:11434by default) - Turn On the
Expose Ollama to the networkoption inSettings
This will allow Ollama API to be reachable from your Home Assistant machine (e.g., http://192.168.x.x:11434).
In Home Assistant:
- Go to Settings → Devices & services → Add integration → Ollama
- Enter the Ollama server address (e.g.,
http://192.168.x.x:11434) - Pick a model (e.g.,
mistral)
Now you have an Ollama conversation agent available.
Step 5: Complete the Voice Assistant Pipeline
Back in Settings → Voice assistants → Home Phone Assistant:
- Conversation agent: Select Ollama
- Now your pipeline is complete: Whisper → Ollama → Piper
Step 6: Assign the Pipeline to Your VoIP Phone
- Go to Settings → Devices & services → Voice over IP → your HT802 device
- Click Configure
- Set Assistant pipeline to “Home Phone Assistant”
- Ensure Allow calls is enabled
Test It Out
Pick up the phone connected to the HT802:
- You should hear a tone (ready to listen)
- Say a command: “Turn on the living room light” or “What is the capital of France?”
- Speak clearly and naturally; STT works best with full sentences (A simple “Hello?” will not work as well)
- After a few seconds, you should hear Piper’s voice respond
Performance Tips
If STT is Too Slow:
- Switch Whisper to
tinymodel: faster but slightly less accurate - Or use
base(best balance) - Add more CPU resources to the Whisper container if possible
If Responses Are Delayed:
- Use a smaller Ollama model (e.g.,
neural-chatorphiinstead ofmistral) - Run Ollama on a machine with a GPU if available
- Reduce Piper voice quality if needed (switch from
mediumtolow)
To Change Voices:
Simply update your wyoming-piper container’s command:
1
command: ["--voice", "en_US-amy-low", "--data-dir", "/data"]
Then restart the container. A new voice will be available next time you call.
Privacy and Control
This setup is completely private:
- No data is sent to cloud services
- No OpenAI, Google, or Anthropic APIs
- All processing happens on your own hardware
- You control which devices are exposed to the assistant
- You can restrict which entities the LLM can modify
You also have full control over:
- Which LLM to use (swap Ollama for another model)
- Which voice to use (dozens of Piper voices in multiple languages)
- Which devices respond (configure only the specific smart home devices you want controllable)
Exposing Smart Home Devices
To let Ollama control your smart home, go to:
- Settings → Voice assistants → Home Phone Assistant
- Under Exposed entities, enable the devices and automations you want the assistant to control
- Ollama will now understand commands like “Turn on the bedroom light” or “Set the thermostat to 21”
You can be very granular: expose some lights but not others, allow control of automations but not certain critical systems, contrary to Apple, Amazon or Google which expose all your devices.
Answering General Questions
Ollama is not just for home control. It is a general-purpose LLM. You can also ask:
- “What is machine learning?”
- “Explain quantum computing in simple terms”
- “What’s the recipe for pasta carbonara?”
- “Tell me a joke”
The LLM responds naturally, making your voice assistant feel more like a conversation than a command interface.
What’s Next?
From here, you can:
- Add multiple phones: Register additional analog phones to the HT802’s second port
- Create different assistants: Have a “smart home” assistant for commands and a “general chat” assistant for questions on different phone extensions
- Experiment with LLMs: Try different models (Llama, Mistral, Phi, Dolphin) to find the best balance of speed and quality for your hardware
- Set up phone-to-phone calling: The HT802 still supports offline phone-to-phone calls (using the
70Xcodes in the IVR), so you have both assistant calls and regular intercom functionality as I wanted originally - Monitor performance: Use Home Assistant’s logs and developer tools to see STT/LLM/TTS performance and optimize
Conclusion
What started as a fun quick setup for a simple intercom system turned into a deep dive into local, private, and fully controllable voice AI. The stack (Whisper, Piper, Ollama, and Home Assistant) is open-source, transparent, and runs entirely on hardware you own and control.
No cloud vendor can eavesdrop. No API limits. No monthly bills for voice processing. Just your voice, your assistant, and your home.
Resources
- Grandstream HT802: https://www.grandstream.com/products/gateways-and-atas/analog-telephone-adaptors/product/ht802
- Home Assistant VoIP Integration: https://www.home-assistant.io/integrations/voip/
- Ollama: https://ollama.ai
- Whisper (Wyoming): https://github.com/rhasspy/wyoming-faster-whisper
- Piper (Wyoming): https://github.com/rhasspy/wyoming-piper
- Piper Voice Samples: https://rhasspy.github.io/piper-samples/