Bulletproof Paperless-ngx Backups with Restic, pg_dump, and Backrest
I’ve been running Paperless-ngx on one of my Zimaboards for a while now and I finally sat down to build a proper backup strategy around it. This post documents the full setup - from dumping the PostgreSQL database to encrypted restic snapshots, a true 3-2-1 backup across multiple machines, plain document exports accessible from my iPhone, and Backrest as a read-only web UI to browse everything.
The Stack
My Paperless-ngx instance runs as a Docker Compose stack on a Zimaboard running user. The relevant containers are:
paperless-webserver-1- the main Paperless-ngx apppaperless-db-1- PostgreSQL 17paperless-broker-1- Redispaperless-gotenberg-1- Gotenberg for PDF generation- An Apache Tika container for document parsing
All AppData lives under /DATA/AppData/paperless/, and backups go to /DATA/AppData/backups/paperless/.
The 3-2-1 Strategy
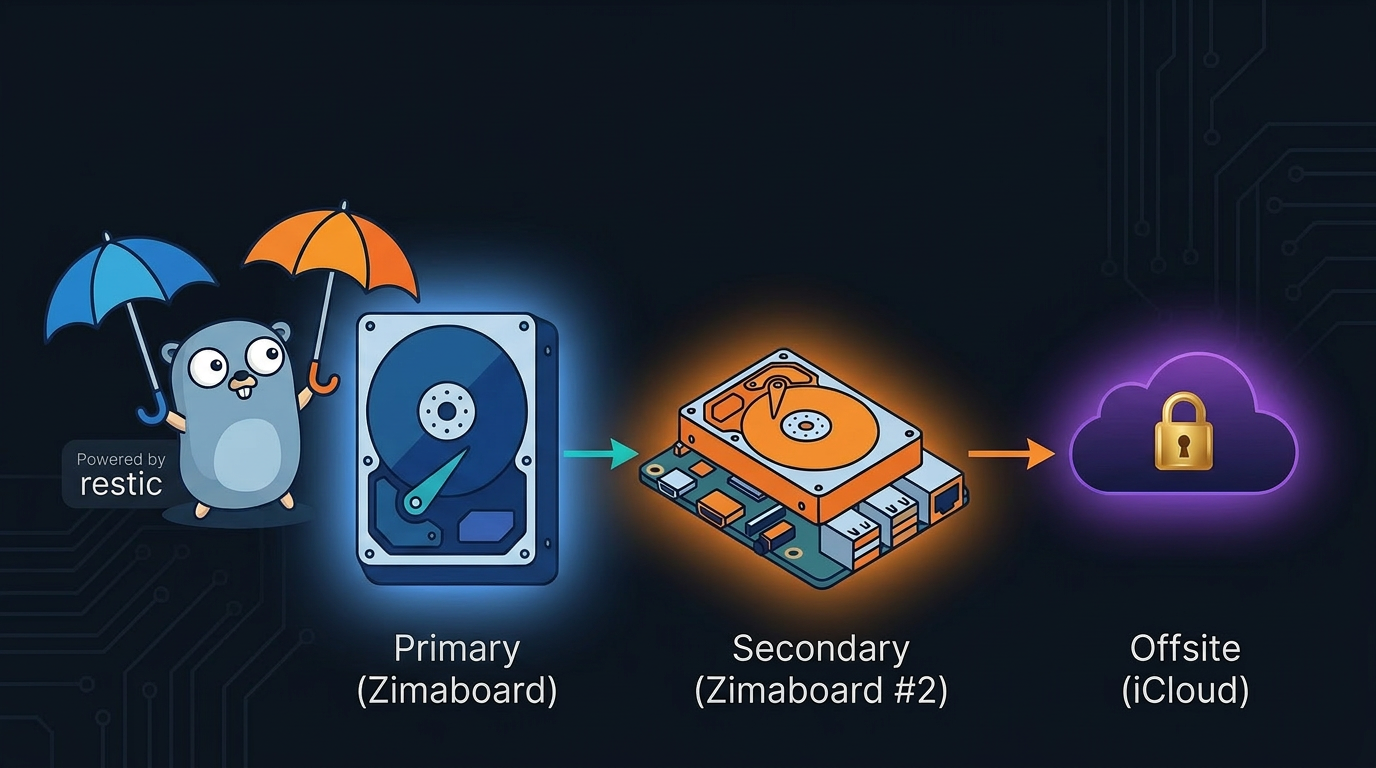
The gold standard for backups is the 3-2-1 rule: 3 copies of your data, on 2 different media/locations, with 1 copy offsite (or on a separate machine). Here’s how that maps to my setup:
| Copy | Where | How |
|---|---|---|
| 1 - Primary | Local HD 1TB on Zimaboard #1 | Restic encrypted repo |
| 2 - Secondary | Second Zimaboard on the network | Rsync of restic repo |
| 3 - Offsite | Mac → iCloud | Rsync of plain export folder |
Each copy serves a different failure scenario:
- Zimaboard #1 dies → restore from the second Zimaboard’s copy of the restic repo
- Both local machines are wiped/ransomwared → restore from iCloud (plain PDFs) or Mac (full restic repo)
- You just need an invoice on your phone right now → iCloud plain export, no restic CLI needed
Why Multi-Layer Within Each Copy?
Beyond the 3-2-1 distribution, each backup also has three independent recovery paths:
- pg_dump - a plain SQL dump, human-readable, database-level restore
- Restic encrypted repo - full snapshot history with deduplication and pruning
- Plain document export - readable PDFs directly accessible from my iPhone via iCloud
The pg_dump covers database corruption. Restic covers accidental deletion. The plain export covers “I just need that file right now without any tooling.”
The Backup Script
All of this is orchestrated by a single shell script at /DATA/AppData/paperless/paperless-backup.sh, which runs inside a dedicated backup container that has access to all the right volumes.
1
2
3
4
5
6
7
8
9
10
11
12
13
14
15
16
17
18
19
20
21
22
23
24
25
26
27
28
29
30
31
32
33
34
35
36
37
38
#!/bin/bash
set -e

mkdir -p "$DUMP_DIR"

TIMESTAMP=$(date +"%Y%m%d-%H%M%S")
DUMP_FILE="${DUMP_DIR}/paperless-${TIMESTAMP}.sql"

# Step 1: Export plain documents
echo "Exporting plain documents..."
docker exec paperless-webserver-1 document_exporter /usr/src/paperless/export
echo "Export done."

# Step 2: Dump PostgreSQL
echo "Starting pg_dump to ${DUMP_FILE}..."
pg_dump -h "$PGHOST" -U "$PGUSER" "$PGDATABASE" > "$DUMP_FILE"
echo "pg_dump done."

# Step 3: Initialize restic repo if needed
if ! restic snapshots >/dev/null 2>&1; then
  echo "Initializing restic repo..."
  restic init
fi

# Step 4: Restic backup
echo "Running restic backup..."
restic backup \
  /usr/src/paperless/data \
  /var/lib/postgresql/data \
  /usr/src/paperless/media \
  /usr/src/paperless/export \
  /usr/src/paperless/consume

# Step 5: Prune old snapshots
echo "Pruning old snapshots..."
restic forget --keep-daily 7 --keep-weekly 4 --keep-monthly 6 --prune

echo "Backup completed."
The script runs in order: export → dump → backup → prune. set -e stops execution immediately on any failure so you’re never silently continuing with a broken state.
Docker Compose for the Backup Container
The backup container is a lightweight Alpine-based image with both restic and pg_client installed:
1
2
3
4
5
6
7
8
9
10
11
12
13
14
15
16
17
18
19
20
21
services:
  paperless-backup:
    image: your-backup-image:latest
    container_name: paperless-backup
    restart: unless-stopped
    environment:
      - RESTIC_REPOSITORY=/repos/paperless/repo
      - RESTIC_PASSWORD=your-restic-password
      - PGHOST=paperless-db-1
      - PGUSER=paperless
      - PGDATABASE=paperless
      - DUMP_DIR=/dumps
    volumes:
      - /DATA/AppData/paperless/paperless-backup.sh:/usr/local/bin/paperless-backup.sh:ro
      - /DATA/AppData/paperless/data:/usr/src/paperless/data:ro
      - /DATA/AppData/paperless/media:/usr/src/paperless/media:ro
      - /DATA/AppData/paperless/export:/usr/src/paperless/export
      - /DATA/AppData/paperless/consume:/usr/src/paperless/consume:ro
      - /DATA/AppData/backups/paperless/repo:/repos/paperless/repo
      - /DATA/AppData/backups/paperless/dumps:/dumps
    network_mode: "host"
The script is mounted read-only from the host, so editing it is just sudo nano /DATA/AppData/paperless/paperless-backup.sh - no container rebuild needed.
Scheduling via Crontab
The backup runs from the host crontab, not from inside a container. This is intentional - if the backup container crashes, the host cron job still fires:
1
sudo crontab -e
1
0 5 * * * docker exec paperless-backup /usr/local/bin/paperless-backup.sh >> /var/log/paperless-backup.log 2>&1
Rsync to Mac and Second Zimaboard
After the restic backup completes, two additional cron jobs push copies off the primary machine. This is what makes it a true 3-2-1.
1
2
3
4
5
6
7
8
9
10
# Push encrypted restic repo + plain export to Mac (→ iCloud)
15 5 * * * mountpoint -q /mnt/mac-backup && \
  rsync -a --inplace /DATA/AppData/backups/ /mnt/mac-backup/paperless-backup/ && \
  rsync -a --inplace /DATA/AppData/paperless/export/ /mnt/mac-backup/paperless-plain-export/ \
  >> /var/log/paperless-rsync-mac.log 2>&1

# Push encrypted restic repo to second Zimaboard
20 5 * * * mountpoint -q /mnt/server2-backup && \
  rsync -a --inplace /DATA/AppData/backups/ /mnt/server2-backup/paperless-backup/ \
  >> /var/log/paperless-rsync-server2.log 2>&1
Both jobs use mountpoint -q as a guard - if the remote isn’t mounted, the rsync is silently skipped rather than erroring out or writing to a local path by mistake. The Mac rsync runs at 5:15 AM, the second Zimaboard at 5:20 AM - staggered to avoid I/O contention.
Plain Export to iPhone
The restic repo is encrypted - you can’t open it on your phone. The plain document export is just PDFs in folders. By rsyncing it to the Mac → iCloud, it becomes accessible from the iOS Files app with no tooling:
1
2
3
4
5
6
7
iCloud Drive/
  paperless-plain-export/
    2024/
      invoices/
      contracts/
    2025/
      ...
Note: The export folder is also included in the restic backup, which technically means it’s stored twice in the encrypted repo. This is fine - restic’s deduplication means unchanged files take up almost no extra space in subsequent snapshots. And having it in restic means you can restore individual PDFs directly from a snapshot without re-running the exporter.
Browsing Backups Without Server Access - Restic Browser
Backrest is great when your servers are up, but what about when you’re away from home and can’t reach your Zimaboards? That’s where Restic Browser comes in. It’s a cross-platform desktop GUI (macOS, Windows, Linux) that lets you open and browse any restic repo directly on your local machine - no server required.
Since the Mac rsync job pulls a full copy of the restic repo nightly, you always have an up-to-date local copy on your Mac. Just open it in Restic Browser with your password and you can browse snapshots, preview files, and restore them without touching a terminal or needing your Zimaboard to be online.
It’s a nice safety net: even if your homelab is completely unreachable, the data is on your Mac and browsable.
Backrest - Web UI for Restic
Backrest is a web UI and orchestrator for restic. I’m using it in read-only mode for now - browsing snapshots and verifying backups are healthy without touching the CLI.
1
2
3
4
5
6
7
8
9
10
11
12
13
14
15
16
17
18
services:
  backrest:
    image: garethgeorge/backrest:latest
    container_name: backrest
    restart: unless-stopped
    environment:
      - BACKREST_DATA=/data
      - BACKREST_CONFIG=/config/config.json
      - XDG_CACHE_HOME=/cache
      - TZ=America/Montreal
    ports:
      - 9898:9898
    volumes:
      - /DATA/AppData/backrest/data:/data
      - /DATA/AppData/backrest/config:/config
      - /DATA/AppData/backrest/cache:/cache
      - /DATA/AppData:/userdata:ro
      - /DATA/AppData/backups:/repos
Mounting /DATA/AppData/backups:/repos (the parent folder) instead of a specific repo path means I can add repos for other apps later - Immich, Nextcloud, etc. - without touching the compose file. In the UI, the Paperless repo is at /repos/paperless/repo.
Important: I kept my crontab + shell script as the source of truth for triggering backups. Backrest schedules live inside the container - if it goes down, they don’t fire. For critical data, host-level cron is more resilient.
One Backrest Per Host
I have three Zimaboards. The right call is one Backrest per host - each board needs local access to its own data, and if one goes down the others are unaffected. The only exception would be all repos living on a shared NAS. For now, one per board keeps things simple and independent.
Full Picture
| Layer | What it covers | Location |
|---|---|---|
document_exporter | Plain readable PDFs | iCloud via Mac rsync |
pg_dump | Full database dump | /backups/paperless/dumps/ |
| Restic snapshot | Encrypted full backup | /backups/paperless/repo/ (local) |
| Rsync → Mac | Copy 2 offsite | Mac → iCloud |
| Rsync → Zimaboard #2 | Copy 3 on separate machine | Second Zimaboard |
| Backrest UI | Snapshot browser (on-network) | http://server:9898 |
| Restic Browser | Snapshot browser (offline/remote) | Mac desktop app |
The whole thing runs unattended every night at 5 AM across three machines. The only thing I’d add next is a Healthchecks.io ping at the end of the script to get alerted if a backup hasn’t run in 25 hours.
Resources
- Paperless-ngx Documentation - official docs covering installation, configuration, and the
document_exportercommand - Restic Documentation - full reference for restic commands, repo management, and pruning policies
- Backrest - GitHub - web UI and orchestrator for restic, with Docker Compose examples
- Restic Browser - GitHub - cross-platform desktop GUI to browse restic repos locally without a server
- Healthchecks.io - free cron job monitoring, get alerted when a backup silently fails
- 3-2-1 Backup Strategy - Backblaze - a good primer on the 3-2-1 rule if you want to read more about the theory