Using OpenClaw with UTM and Tailscale: Secure and low cost
In the rapidly evolving world of AI automation, OpenClaw has emerged as one of the most exciting open-source projects of 2026. Originally known as Clawdbot and Moltbot, this self-hosted AI agent has exploded in popularity on GitHub in just a few days. Unlike typical chatbots, OpenClaw acts as a true personal AI assistant that runs locally, remembers context across conversations, and can actually execute tasks on your machine.
But there is a challenge: giving an AI agent direct access to your main system can be risky. Additionally, running powerful LLMs continuously can rack up serious API costs. In this guide, I will walk you through my setup that solves both problems: running OpenClaw in an isolated UTM virtual machine, secured with Tailscale and using GitHub Copilot’s cost-effective API to keep expenses minimal.
My Setup
The Problem with Direct Installation
OpenClaw is incredibly powerful, it can run shell commands, interact with files, and execute scripts on your behalf. While that is exactly what makes it useful, it also means you are giving an AI agent significant system access. For a homelab enthusiast like myself who runs multiple critical services, the idea of OpenClaw potentially interfering with my Home Assistant setup, Docker containers, or network configuration is not appealing.
The Cost Factor
Most OpenClaw tutorials showcase setups using Claude Opus or GPT-5, which can cost $15-$60 per million tokens. If you are running an agent that continuously processes tasks, those costs add up quickly. GitHub Copilot, on the other hand, offers a much more economical approach.
My Solution: UTM + GitHub Copilot + Tailscale
By running OpenClaw in a UTM virtual machine, we get:
- Complete isolation from the host system
- Easy rollback if something breaks
- No need for additional hardware or VPS costs
- Ability to snapshot and clone the environment
- Clean separation between production and experimental AI tools
Combining this with GitHub Copilot’s API access gives us:
- Just $10/month for unlimited completions and 300 premium requests (Pro tier)
- Access from GPT-4.1 to Claude Opus 4.5 models
- The ability to switch between models based on task complexity
Finally, by adding Tailscale into the mix, we get:
- Secure with no direct connection from the Internet
- Still accessible while away from home
- Zero Trust security
Prerequisites
Before we begin, ensure you have:
- A Mac (Apple Silicon)
- UTM installed (free download from getutm.app)
- GitHub Copilot Pro subscription ($10/month)
- 4GB RAM available for virtualization
Step 1: Setting Up the UTM Virtual Machine
Download and Install UTM
UTM is a fantastic free and open-source virtualization platform for macOS that uses QEMU under the hood. Unlike heavyweight alternatives like Parallels, UTM is lightweight and perfect for running VMs on Apple Silicon.
First, download UTM from getutm.app.
Creating the macOS VM
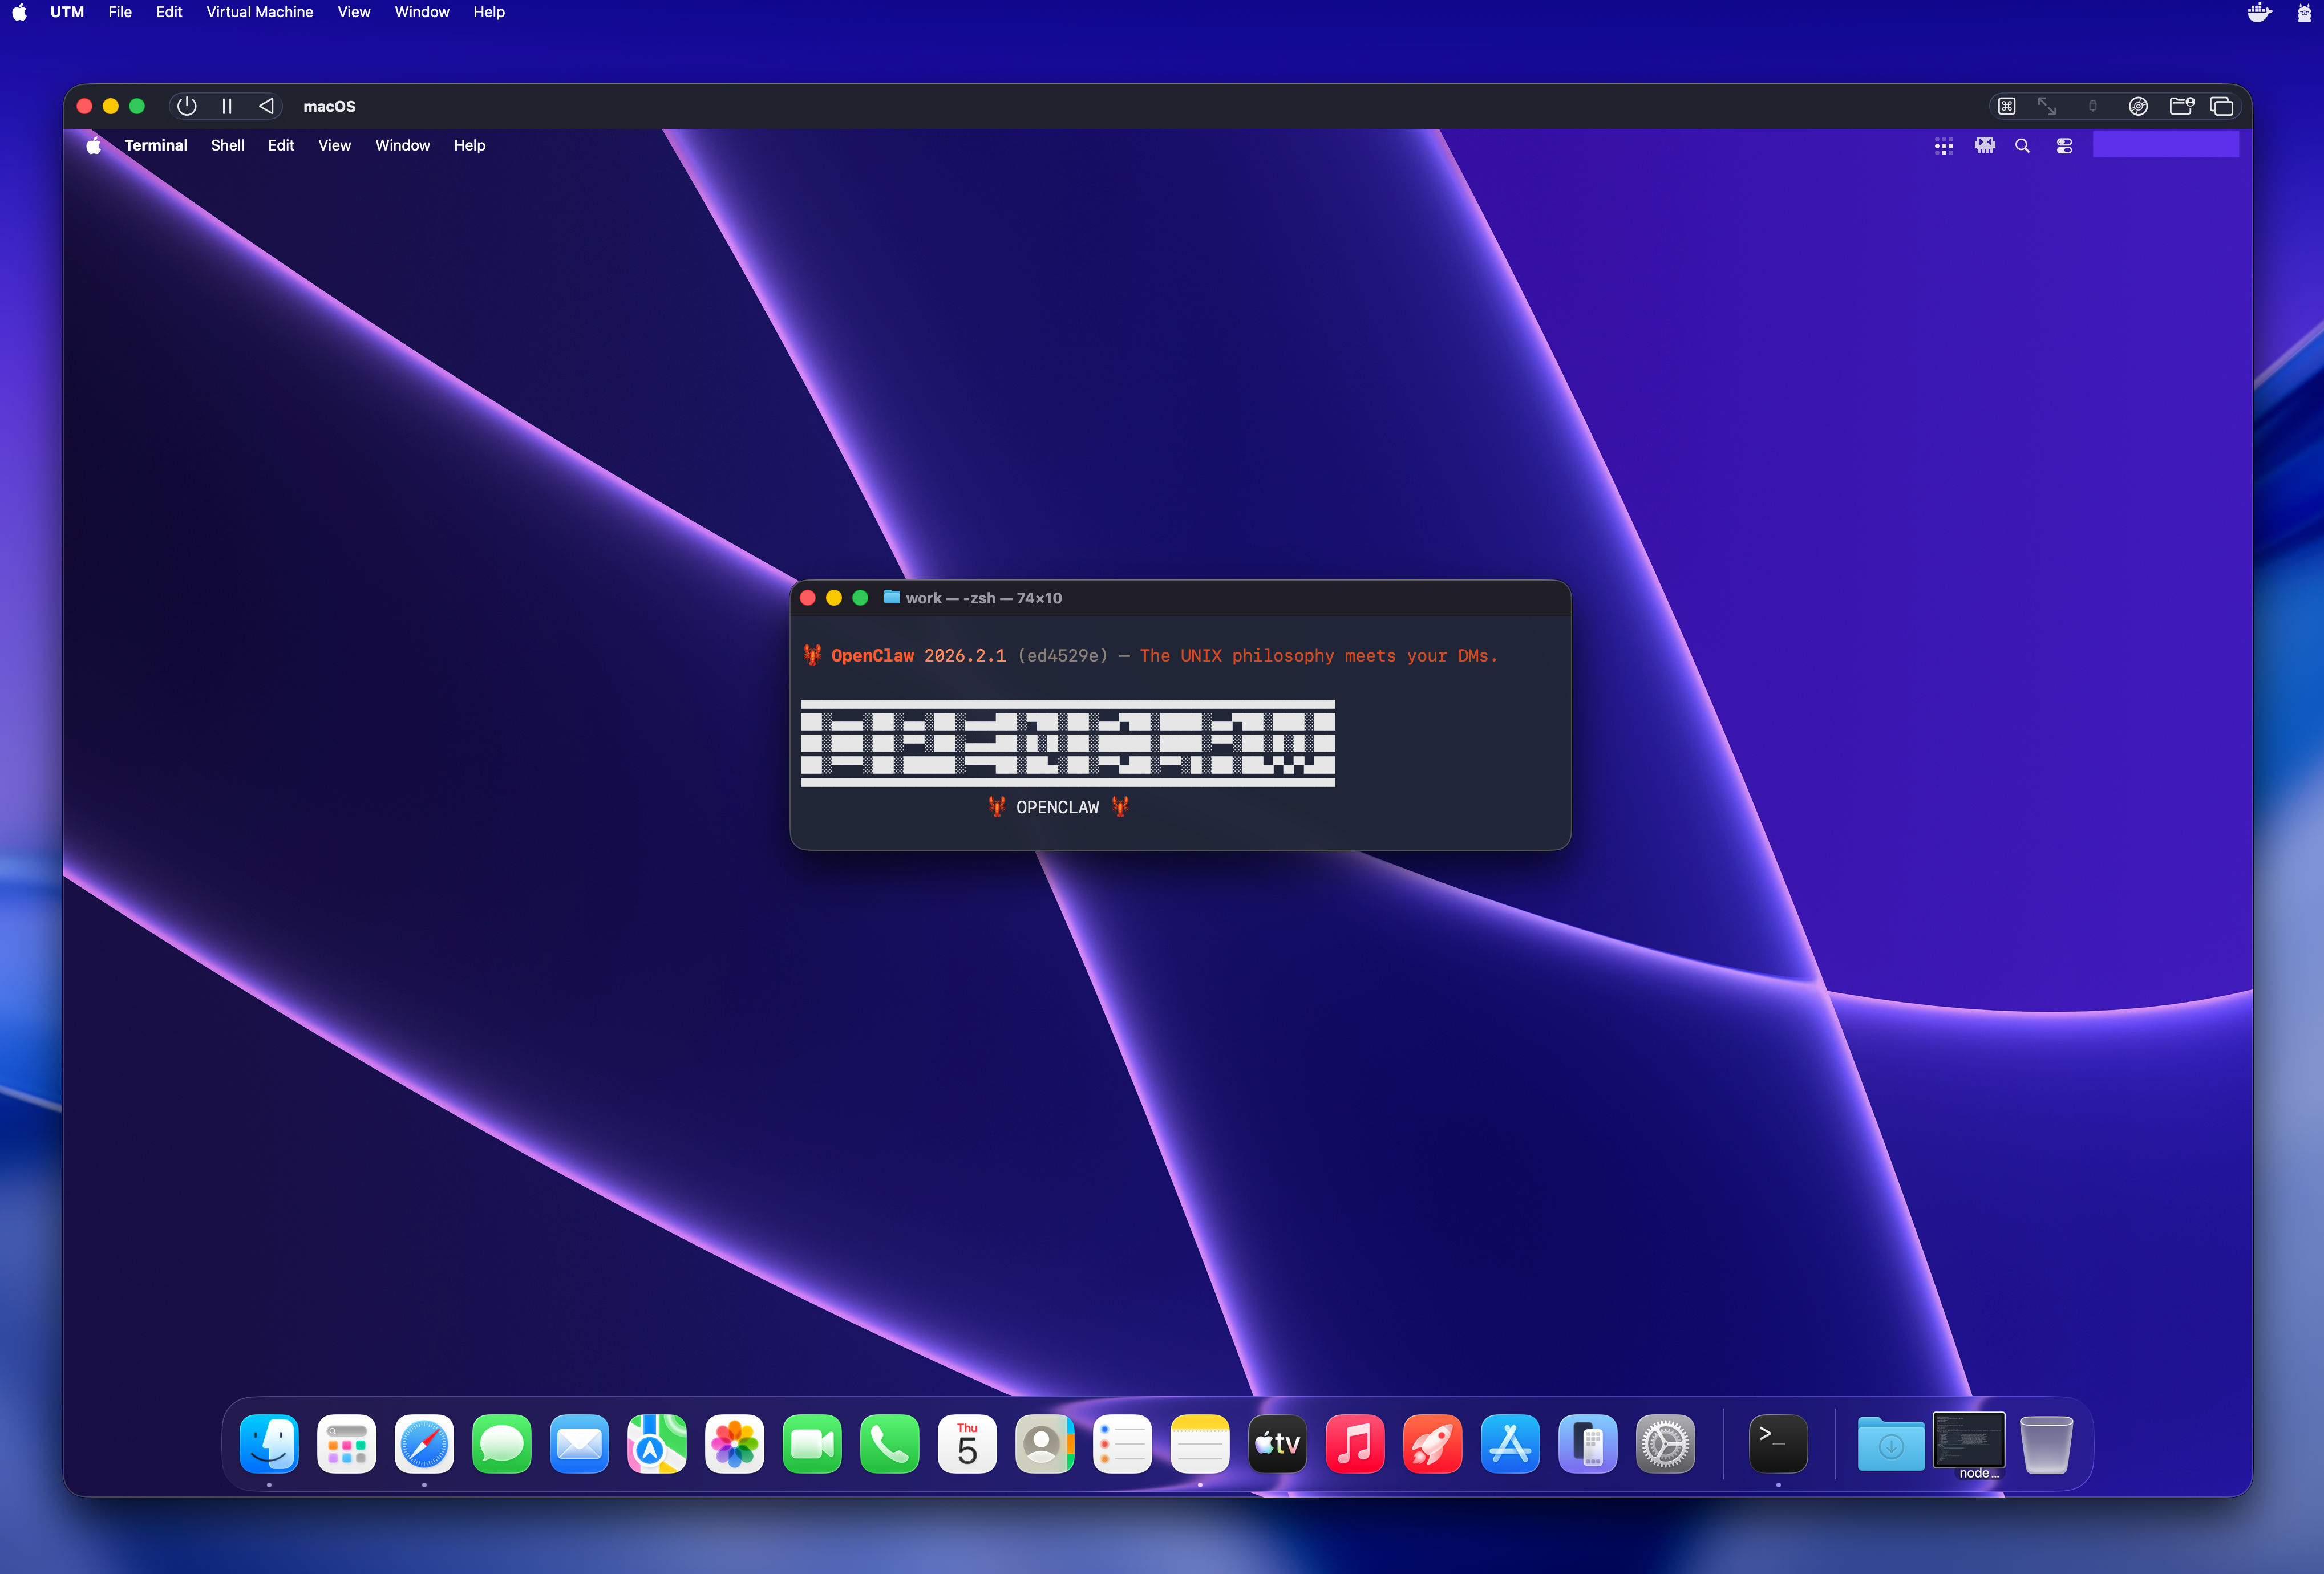
For OpenClaw, I chose to run a macOS VM since UTM’s virtualization on Apple Silicon provides excellent performance for macOS guests, and OpenClaw has native Mac support with simplified installation.
Creating the VM in UTM:
- Launch UTM and click “Create a New Virtual Machine”
- Select “Virtualize” (for Apple Silicon native performance)
- Choose “macOS 12+” as the operating system
- Configure RAM to at least 4GB
- Enable “Open VM Settings” and click “Continue”
Installing macOS
Boot the VM and follow the macOS installation wizard. The process is straightforward:
- Select your language
- Follow the standard macOS setup wizard
- Create your user account
The installation takes about 10-20 minutes depending on your Mac’s performance. Once complete, boot into your new macOS VM.
Initial System Configuration
After the first login, install Homebrew (this should always be the first thing to do on a new Mac):
1
/bin/bash -c "$(curl -fsSL https://raw.githubusercontent.com/Homebrew/install/HEAD/install.sh)"
Step 2: Installing OpenClaw
Now for the main part: installing OpenClaw itself. On macOS, the installation is simple.
One-Command Installation
OpenClaw provides a streamlined installation script for macOS:
1
curl -fsSL https://openclaw.ai/install.sh | bash
This single command handles everything:
- Downloads the latest OpenClaw release
- Installs all dependencies
- Sets up the application structure
- Creates necessary configuration files
The process takes 2-3 minutes. Once complete, you will see a success message with next steps.
Understanding OpenClaw’s Architecture
Before we configure it, it is helpful to understand how OpenClaw works. At its core, OpenClaw is an autonomous AI agent platform that:
- Provides a local web dashboard (Gateway) for interaction
- Connects to LLM providers (in our case, via GitHub Copilot)
- Maintains persistent memory and context across conversations (using Markdown files)
- Executes tasks using “skills” (extensible modules)
- Can optionally integrate with messaging platforms
This architecture is what makes OpenClaw so powerful, it is not just a chatbot, but a full orchestration layer for AI-powered automation. The Gateway dashboard provides a clean, web-based interface without needing external messaging apps.
Step 3: Configuring GitHub Copilot as the LLM Backend
This is where our setup gets interesting. Instead of paying for direct API access to Claude or OpenAI, we will use GitHub Copilot’s API access, which is included in the $10/month Pro subscription.
Using the OpenClaw Onboarding Wizard
OpenClaw includes a helpful onboarding wizard that makes configuration straightforward.
- Welcome Screen: Overview of OpenClaw’s capabilities
- LLM Provider Selection: Choose “GitHub Copilot” from the list
- Authentication: Enter your GitHub Copilot credentials
- Model Selection: Choose your preferred models
Configuring GitHub Copilot Access
When the wizard prompts for GitHub Copilot setup, you will need to authenticate. The wizard will open a GitHub authentication page where you authorize OpenClaw to access Copilot on your behalf. This uses OAuth, so you do not need to manually create tokens.
Model Selection Strategy
During the onboarding wizard, when asked to select models, I chose:
Primary Model: GPT-4.1
- Fast response times
- Excellent for general queries and coding tasks
- Included in the base Copilot Pro tier
- Cost-effective for daily use
Secondary Model: Claude 4.5 Haiku
- Incredibly fast and efficient
- Great for quick responses and simple tasks
- Very cost-effective (much cheaper than Sonnet/Opus)
- Perfect for routine interactions
Here is my reasoning for this combination:
- GPT-4.1 handles most tasks with good quality and speed
- Claude 4.5 Haiku is my go-to for quick questions and simple operations where speed matters more than complex reasoning
- This combination keeps me well within GitHub Copilot’s free tier limits
- I avoid premium models (Opus/Sonnet) unless absolutely necessary
- I can still use GitHub Copilot with VS Code as usual without risking reaching my monthly limit
The wizard will save these preferences automatically, but you can always change them later in the Gateway dashboard settings.
Monitor usage:
Check your GitHub Copilot usage at github.com/settings/copilot to ensure you are staying within tier limits.
Step 4: Accessing OpenClaw via Gateway Dashboard
Unlike traditional OpenClaw setups that require messaging platforms like Telegram or WhatsApp, I use OpenClaw’s built-in Gateway dashboard exclusively. This provides a clean, web-based interface that is perfect for my homelab use.
Launching the Gateway
After installation and configuration, start OpenClaw:
openclaw start
The Gateway dashboard automatically opens in the default browser at http://127.0.0.1:18789. You will see:
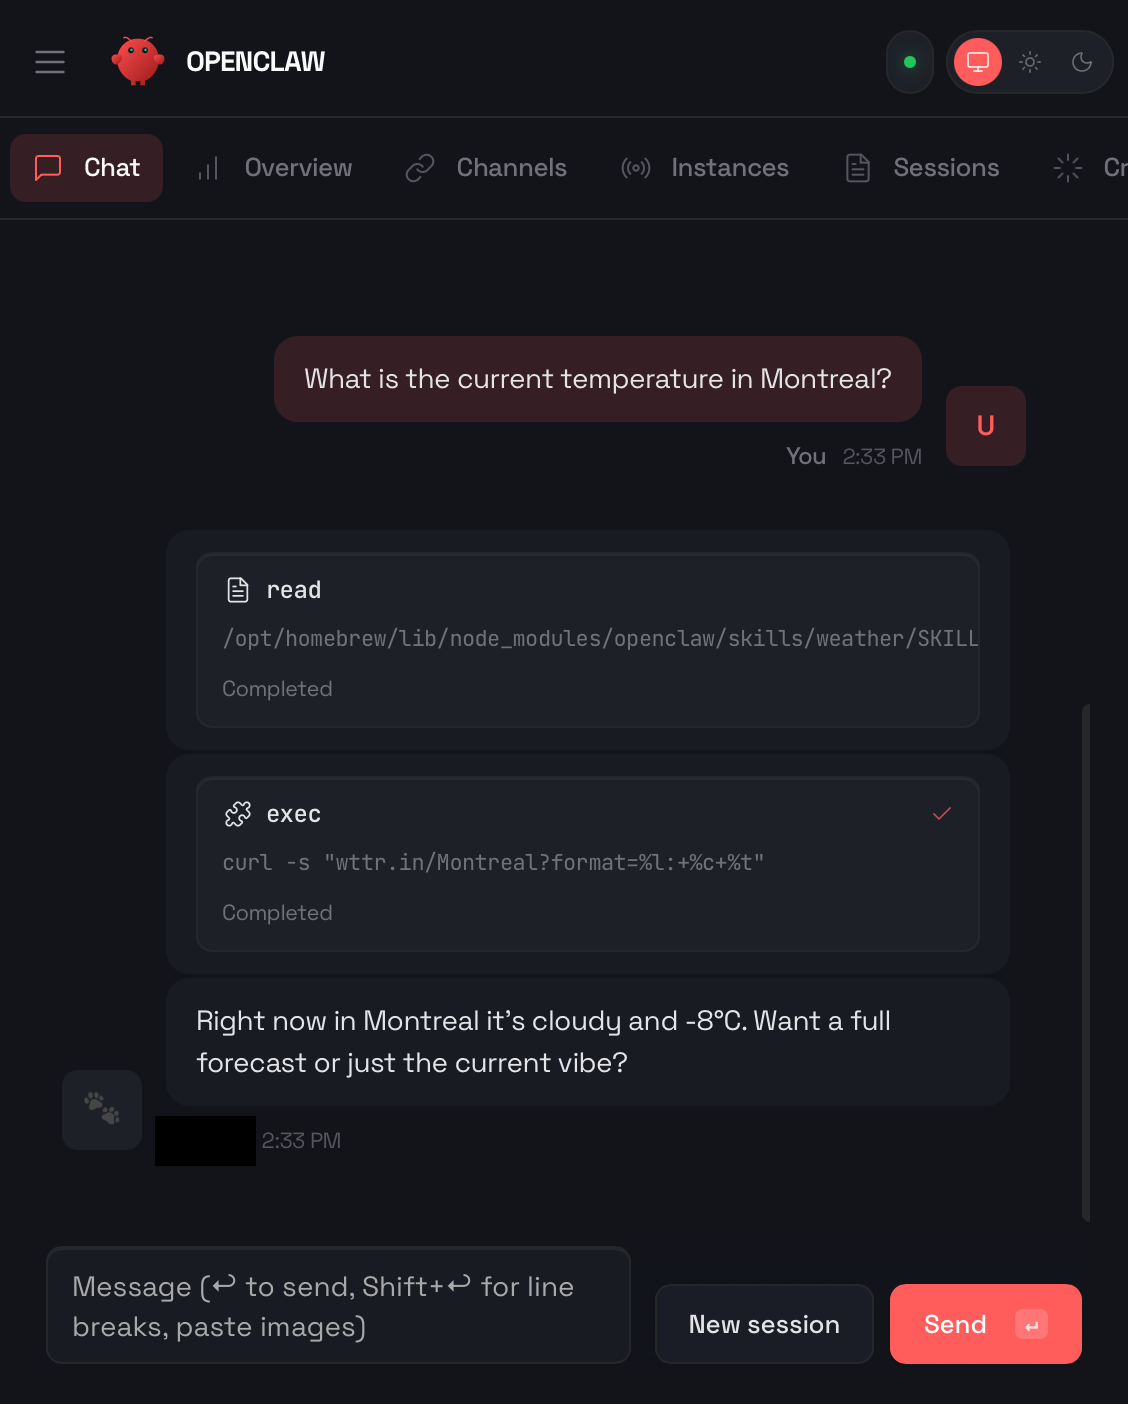
- Chat Interface: Clean conversation view with your AI assistant
- Model Selector: Quick toggle between GPT-4.1 and Claude 4.5 Haiku
- Context Manager: View and manage conversation memory
- Skills Library: Browse and activate OpenClaw skills
- Settings: Adjust behavior, security, and integration options
Why Gateway Chat Over Messaging Platforms
I chose to skip Telegram, WhatsApp, and other messaging integrations for several reasons:
- Simplicity: No need to create bot accounts or manage API tokens
- Privacy: Everything stays on your local network
- Speed: Direct connection without external services
- Features: Full access to OpenClaw’s capabilities in one interface
- Security: No data leaving your controlled environment
The Gateway dashboard Chat provides everything you need for interacting with OpenClaw without the complexity of external messaging platforms.
Step 5: Securing with Tailscale
One of the best decisions I made was integrating Tailscale into this setup. Tailscale creates a secure, encrypted mesh network (WireGuard-based) that allows me to access OpenClaw’s Gateway dashboard from anywhere while maintaining maximum security.
Installing Tailscale in the VM
Inside your macOS VM, install Tailscale:
1
brew install tailscale
Start Tailscale and authenticate:
1
sudo tailscale up
This will open a browser window asking you to authenticate with your Tailscale account. Once connected, your VM gets a Tailscale IP address (typically in the 100.x.x.x range).
Accessing Gateway via Tailscale
Now, instead of accessing OpenClaw at http://127.0.0.1:18789, you can access it from any device on your Tailnet at:
https://100.x.x.x
(Replace with your VM’s actual Tailscale IP, which you can find by running tailscale ip in the VM)
Why This Is So Secure
This Tailscale setup provides multiple layers of security:
- End-to-end encryption: All traffic between devices is WireGuard-encrypted
- No open ports: No need to forward ports on your router or expose services to the internet
- Zero-trust network: Only devices you authorize can connect
- VM isolation: OpenClaw runs in an isolated VM, separated from your main system
- Private IP space: Tailscale IPs are not routable on the public internet
- No VPS needed: Everything stays on your local network, with secure remote access
Practical Benefits
With this setup, I can:
- Access OpenClaw from my iPhone while away from home
- Use it from my MacBook Pro without being on the same local network
- Share access with family members by adding them to my Tailnet
- Maintain complete privacy, no data goes through third-party servers
- Avoid the complexity and cost of VPS hosting
The combination of UTM virtualization + Tailscale networking means OpenClaw is both isolated from my production systems AND securely accessible from anywhere.
Practical Use Cases
Now that we have OpenClaw running, here are some powerful ways I use it in my homelab environment.
Code Review and Documentation
Since we are using GitHub Copilot, OpenClaw is particularly good at code-related tasks:
- “Review the latest commit in my homelab repo”
- “Document this Python script”
- “Explain what this automation does”
System Monitoring
OpenClaw can monitor the VM itself or query external systems:
- “Check disk space on my server”
- “Show me Docker container status”
- “Alert me if any service is down”
- “Generate a system health report”
Personal Knowledge Base
With persistent memory enabled, OpenClaw builds a knowledge base about your preferences and systems:
- Remembers your homelab architecture
- Recalls previous troubleshooting sessions
- Maintains context across conversations
- Suggests solutions based on past issues
Conclusion
Running OpenClaw in a UTM virtual machine with GitHub Copilot as the LLM backend represents a perfect balance of power, security, and cost-effectiveness. For just $10/month, you get:
- A fully capable AI assistant with access from GPT-4.1 to Claude Opus 4.5
- Complete isolation from your production systems
- No need for additional hardware or expensive VPS services
Once configured, OpenClaw becomes a valuable addition to your homelab toolkit. Whether you are using it for code review, home automation, system monitoring, or general assistance, the combination of UTM’s virtualization, GitHub Copilot’s economical AI access, and Tailscale’s secure isolation from the Internet makes this a sustainable long-term solution.
As someone running multiple servers with Home Assistant, Docker and various smart home integrations, having an AI agent that can help without risking my production environment and security is invaluable.
If you are interested in AI automation but concerned about costs or security, I highly recommend giving this setup a try. The investment of time is minimal, the ongoing costs are negligible, and the potential benefits are substantial.
Additional Resources
- OpenClaw Official Website: https://openclaw.ai
- OpenClaw GitHub Repository: https://github.com/openclaw/openclaw
- OpenClaw Documentation: https://docs.openclaw.ai
- UTM Download: https://mac.getutm.app
- GitHub Copilot Plans: https://github.com/features/copilot/plans
- Tailscale Website: https://tailscale.com